Friday, September 13, 2013
A Morpho Butterfly Costume
Cole started Kindergarten in 2013 and one of his first really fun class assignments was "Dress up as your favorite invertebrate day." His classroom had studied invertebrates, including having a keeper actually come to the school and introduce them to some invertebrates! We were supposed to use items from home to create a free costume.
Well, giving Cole total control over his costume, he requested a Morpho butterfly (he has a giant insect encyclopedia and naturally blue being his favorite color, the morpho is his favorite of the butterfly family).
I quickly assembled the basic of his costume: black long-sleeved pajamas for his body coupled with black socks/shoes. A black headband quickly became a base for antennae (made from brown/black puffy pipe cleaners). The wings were challenging.
Brandon free handed the shape of the wings on cardboard while looking at the picture of the butterfly in Cole's insect book. Why yes my five year old does read expository books intended for adults.
After B cut out the wings, he took them outside and spray painted them with a white primer we had on hand.
Then it was my turn! I mixed a blue that I wasn't hating for the base. Then I mixed varying shades of deeper blues to shade the wings. Finally, I mixed brown/black to make veins on the wings.
I think they came out nicely enough, but I wish the top left veins weren't so dark compared to the others.
Finally, I edged the entire wings in brown and painted the visible part of the hanger black to disguise it as best we could.
I love how it turned out.
I had to work the following morning so Brandon was sure to snap lots of pictures of a very happy Cole who suggested a need for a tongue. Brandon grabbed a bendy straw and quickly painted the base red.
Love him. I'm fairly certain he was the only male butterfly in his class, but he's wonderful.
Look at that wonderful black front. No one suspects he's a beautiful butterfly yet!
Saturday, May 18, 2013
A First Birthday
Collin turned one year old on May 5th, 2013!
We celebrated his birthday by inviting the immediate and extended families of Brandon and myself, as well as a friend of Cole's from preschool.
Due to unforseen circumstances, I didn't get any photos of the party beyond the cupcakes that I assembled (purchased uniced from Freeport Bakery in lemon cake flavor) and the tables before guests arrived.
I really would have liked more photos but ah well -- roll with the punches.
I was inspired by Martha Stewart's website for the cupcakes. We had a very casual BBQ style party.
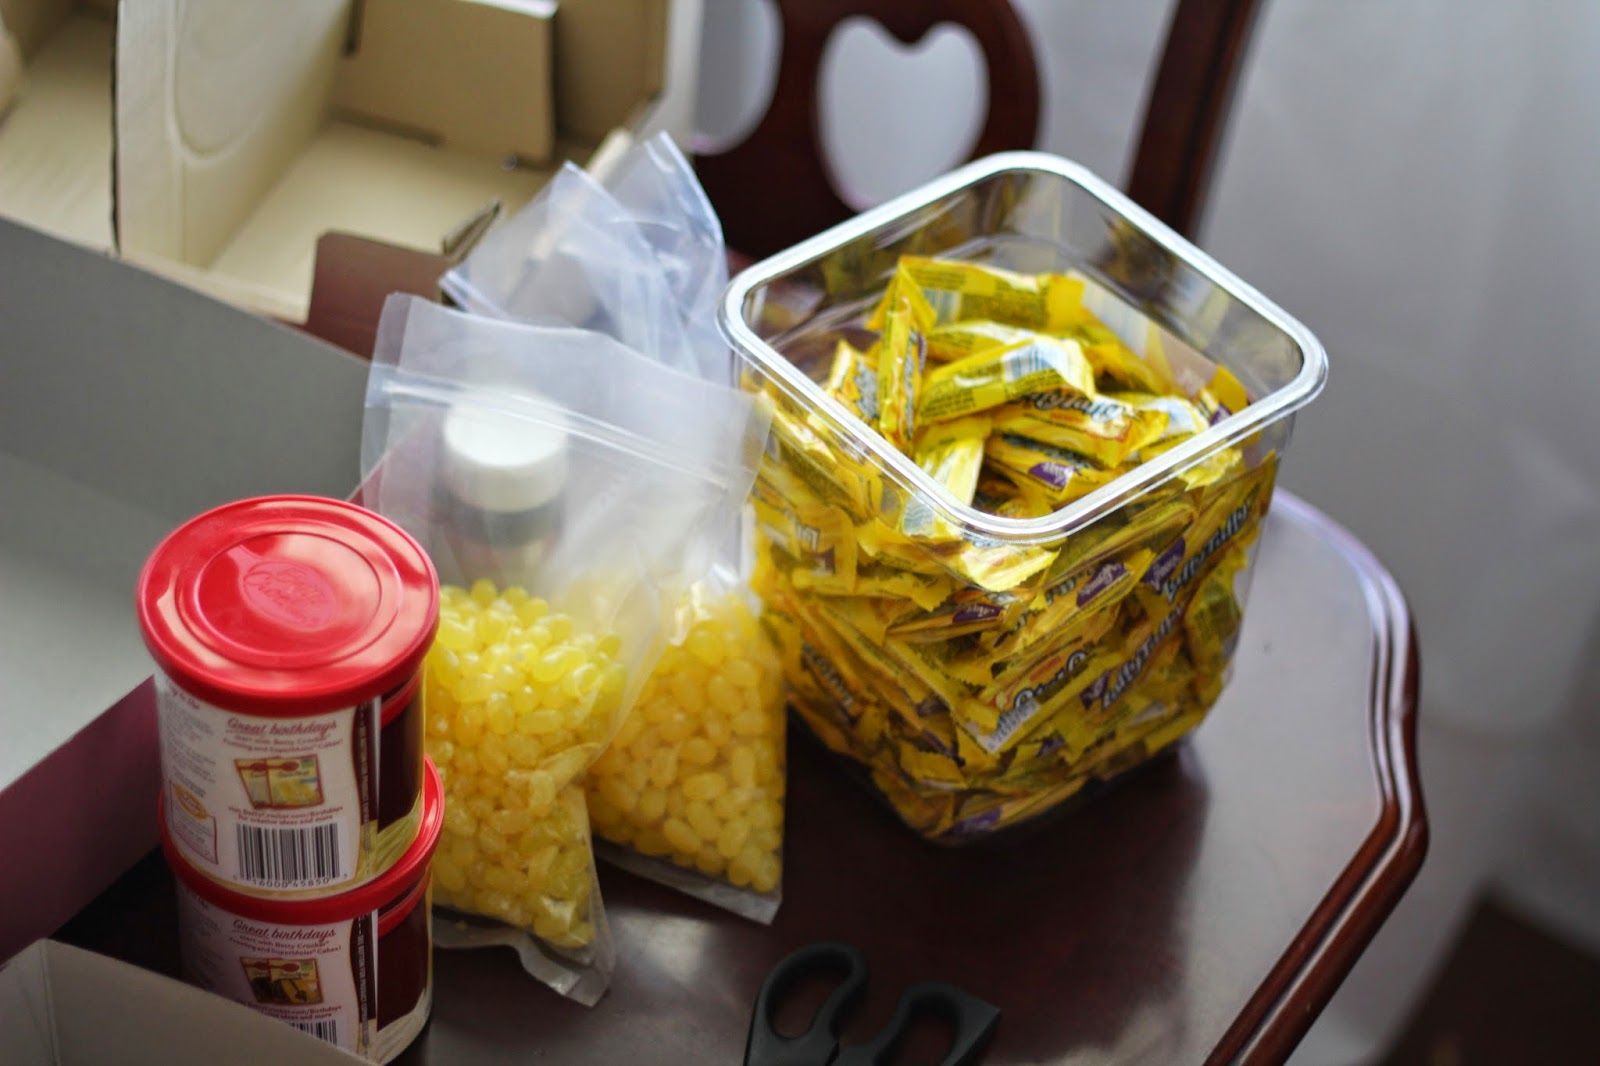
I ordered un-iced cupcakes from our go to bakery -- Freeport Bakery. You can find past decorated party cakes in the reviews page (tab on top under blog banner). I then iced them with store bought icing -- some vanilla, some lemon.
I cut banana laffy taffys into halves to represent a pat of butter. I took a heck of a while putting two types of lemon flavored jelly beans on top to represent corn kernels. Finally, I sprinkled some edible black glitter flakes over the top to look like pepper.
And pretty cute cupcakes were born! These took forever to assemble. If I had to do it again, I'd pay someone for it, plan to make them the night before, or have a second or third person on hand to help with assembly.
We used a car canopy that we've owned for a few years to create a shaded area in our backyard. We used tables we purchased at Costco for entertaining and rented chairs from a local company.
For decor, I kept things very simple. Using mason jars gifted from my mother, I cut sprigs of geraniums from the front flower bed (no shortage of blooms there) and just placed one at each table. Simple, sweet. We had buds on the rosebushes.
For entertainment, we had squirt guns for the older children and the playroom opened for the kids. The adults all had large groups of known family to spend time catching up with so no entertainment was necessary there.
I would love to attempt hosting another get together in the future. Perhaps more of a potluck next time though.
Bonus picture: my little trowel wielding one year old.
Wednesday, March 6, 2013
Lego Table
So to say that my older son is obsessed with building might be a huge understatement. That child is so wrapped up in building with any and every material he can lay hands on. He especially likes building with legos.
We made him a writing center some time ago but he had taken over his writing table for lego play during pretty much all of his free play. Additionally, Cole has a habit of bringing the legos into spaces that are not safe (read: where his infant brother is).
I had started pinning different lego storage ideas and tables on pinterest with making something for Cole in mind. We cycled through two ideas before finally settling on this tutorial.
It was so simple to get all of the parts and put it together. I ordered everything we needed and then waited. We pretty much used everything that the tutorial above used.
We bought a LACK side table from IKEA. I was incredibly fortunate to have a son who loved the cheapest one the very most. It cost us $7.99. We bought the VESSLA storage crate for $5.99 and the VESSLA lid for $2.00 which made the storage container exactly the same cost as our table. I find that highly amusing.
We intended to use the KRITTER series children's chair we bought for Cole's writing center a few years ago. It's still available for $12.99.
I often buy at Amazon when I can but after shopping around, I found even with the cost of shipping from www.lego.com that the order through them would be cheaper. We bought 4 of the 10x10 baseplate in blue so that it would contrast the green table. These were the most expensive part of our project. They also come in green! Finally, Cole and I went to Home Depot and picked up some Contact Cement. They had a small bottle for under $5. Gloves and masks were also purchased just for funsies.
We got some safety gear on. With a fan in the window to ventilate the room, we were ready to start.
Excuse the mess. We're prepping for a move plus we have a five year old who is not friendly to cleaning.
And we set off to work. We placed the plates on the table and eyeballed them to center them on the table. We taped around the plates with painter's tape to mark our placement.
You need to let the contact cement cure before placing the two items together. We got some glue on the table and then the back of the plates. After 15 minutes of curing, we were ready to put the baseplates on.
Also of importance: If you want the legos to work across all four baseplates you need to be sure to test with bricks as the baseplates will not function fluidly if they're flush against each other. There has to be a miniscule gap for the four plates to work well together.
We found that there's a small window to adjust the baseplates after you lay them down. Our strategy was to lay one as close as we could to our tape off and then lay the second. We then grabbed a brick and tried to lay it across both plates. If it worked okay, we were perfectly positioned. If it didn't fit right, we shifted the plate before pressing it down to permanently seal it.
As you add in the other plates make sure you're testing both sides.
Our end result.
I love it.
He does too. He plays with it every single day. I'm already thinking about where it will be homed in our new rental.
Sunday, March 3, 2013
Chore Chart
We had a chore chart for our son from Melissa and Doug (which you can see in the right side of the first picture but it has since been donated to the local thrift store) but it really didn't get used and it didn't cover the categories that we would have liked. It also didn't allow for repeating a chore multiple times a day.
I decided one night to randomly make my own on a white board so that it could be modified as my son got older and his responsibilities grew or changed.
I used frog tape but because I couldn't find my xacto knife (hello chaos from a move), I just ripped strips with my hands which ended up making for a very uneven graph lining.
Oh well. It's for my five year old. I can always redo it later on if it continues to annoy me.
So we have set values on his chores and I have a running tally notebook where I mark his total for the day and we do a Saturday payout every week.
Simple. Quick. Easy. It would have been more time consuming and more attractive to have even strips. But I don't mind it terribly and I'm not jumping up and down to redo it presently.
Friday, March 1, 2013
IKEA lusting
I've never been in love with bedspread before. Sure, I see some I like well enough. I have a general idea of what I want color/feel wise.
In the last three years, I've really become obsessed with grays and blues. I love them with whites and blacks and silvers. I just want everything in it. It's a little bit of a problem.
Today I went to IKEA on a mission to get a new bed for my oldest son. I had the opportunity to really search the store for the first time too. I'm lusting after a lot now. Most of which I'm having trouble finding online which begs the question: what are at other IKEA's that I want and don't know about?
I fully intend to post photos of the IKEA decor I've picked up that I can't find online and I fully intend to post photos of the things I can show off when we get settled into the new house.
But for now, my IKEA lusting. I desperately want a sheet set and bedspread for my bedroom.
Brandon isn't much for love on the pattern but he doesn't care enough about the decor to forbid I buy the set. Now if a few loved ones got the hint about IKEA in lieu of Michael's gift cards in the future. Cough, cough.
The bedspread. I must have this before it goes out of style! It is the ALVINE KVIST duvet cover and pillowcase set. At $29.99 I've seen a lot more expensive sets. I want this so bad!
DVALA sheet set in dark blue. $24.99. This underneath white and gray. Yum!
And two comforters for different seasons.
Warmth 1 at $19.99 of the MYSA STRA collection.
Warmth 3 at $29.99 of the MYSA STRA collection.
As an aside, I'm planning to get these cheap placemats to place into my new fridge for easy cleanup. They're KLISTRIG placemats at IKEA. A set of 4 for $2.99.
And did you catch that? New fridge. We're really excited to be making such a big purchase. In all places past, we've had fridges come with the unit. This is our first time having to supply our own fridge.
We were going to go through Costco to save $50 off the MSRP on the model we picked, but then I saw that Home Depot is offering a 10% off appliance sale through March 6th which would in turn save me $50 on top of the Costco savings for a total of $100 off. Not the best deal but on short notice and in immediate demand -- we'll take it.
Here's the fridge we're purchasing.
It's a Maytag refrigerator in stainless steel. Model #: M1TXEGMYS.
We're also planning to pick up a chest freezer for extra frozen storage. We selected this GE freezer (also on sale for 10% off). Model #: FCM15PUWW.
So looking forward to having a new space to decorate and this is one I can do the outside of too. And some sneak peeks of things you'll be seeing around our new house.
KRITTER bed in Pine. Cost is $99.99.
VYSSA VACKERT mattress for small bed. $79.99.
LEN fitted sheet. $5.99.
BARNSLIG RAND. $24.99.
MYSA GRAS comforter. $7.99.
KUSINER underbed storage. $7.99.
MAMMUT shelf. $6.99.
EIVOR curtains, $14.99 for a pair.
Subscribe to:
Posts (Atom)